Andrew Booth 3D
  • Home
  • About me
  • Asset Library
  • WIP Archive
  • Linkedin
  • Twitter
  • Contact Me

Studio Experience

Toon Shader

Picture
This game scene is to test my most recent shader, at my independent Games Studio that I worked with wanted a cel-shaded style third-person portal inspired game. As I never made a toon/ cel shader before creating the shade I did some heavy research. there many flaws to the technique but the style and looks of the game look fantastic test it out in Unreal Engine. The process uses post production processes where it offset all the edges my a pixel on all direction; reduce the colour then filter back in the colour in steps making 3D toon style. This style is work perfectly on simple block colours however the more busy the texture is such as a brick or a stone wall the more it will make it appear more pixelated as its too much information broken down then filter back in steps.
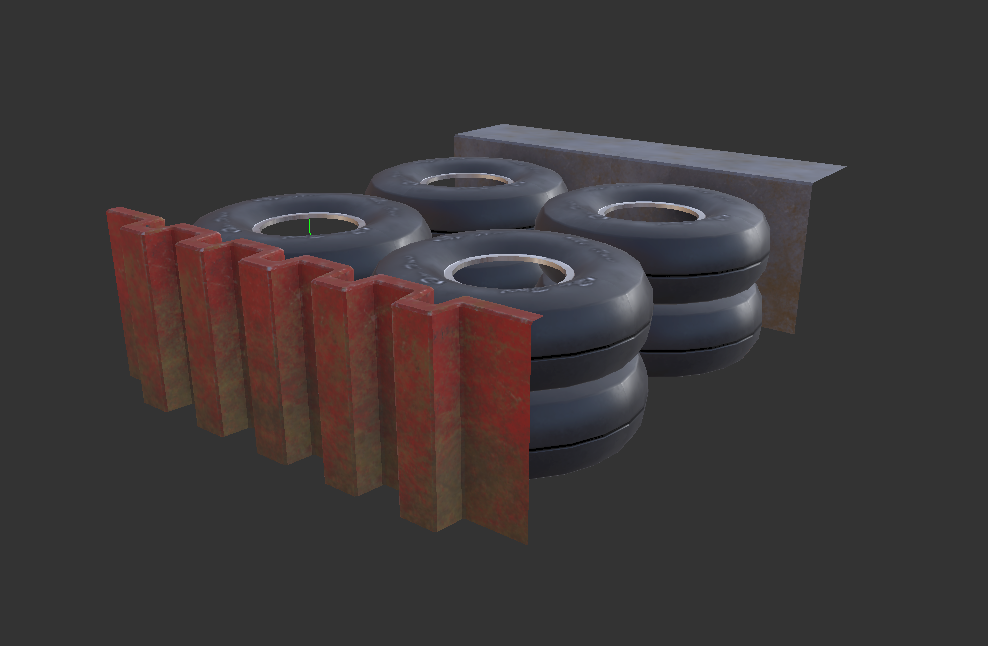
Tire Barrier

Tire Barrier by Andrew Booth 3D on Sketchfab

Picture
This 3D scene prototype testing out modular tire barrier asset designed for a collaborative racing game project that I created using Maya & Substance Designer for an Independent Games Studio. Due to the collapse of the studio through, I wasn't able to take this model any further than a prototype stage, however this would have be attached to a spline node around racing track

3D Features

Picture
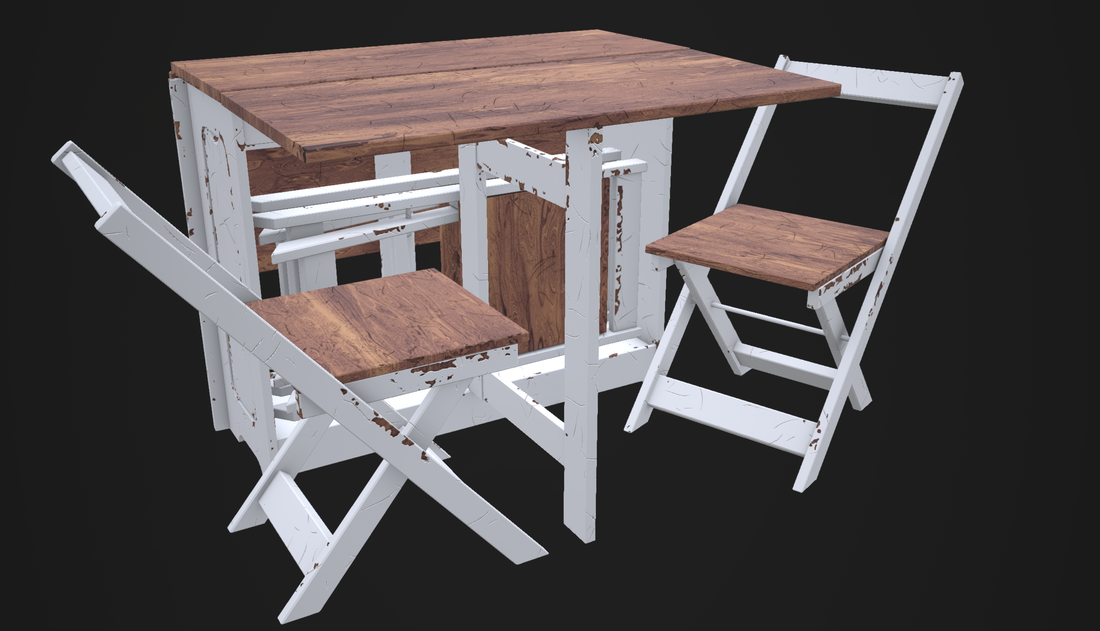
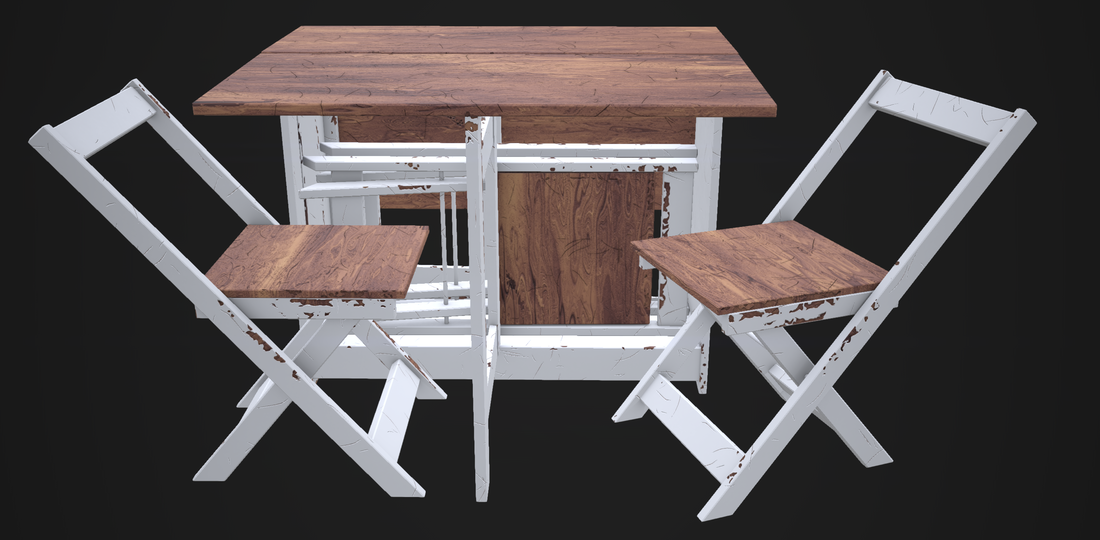
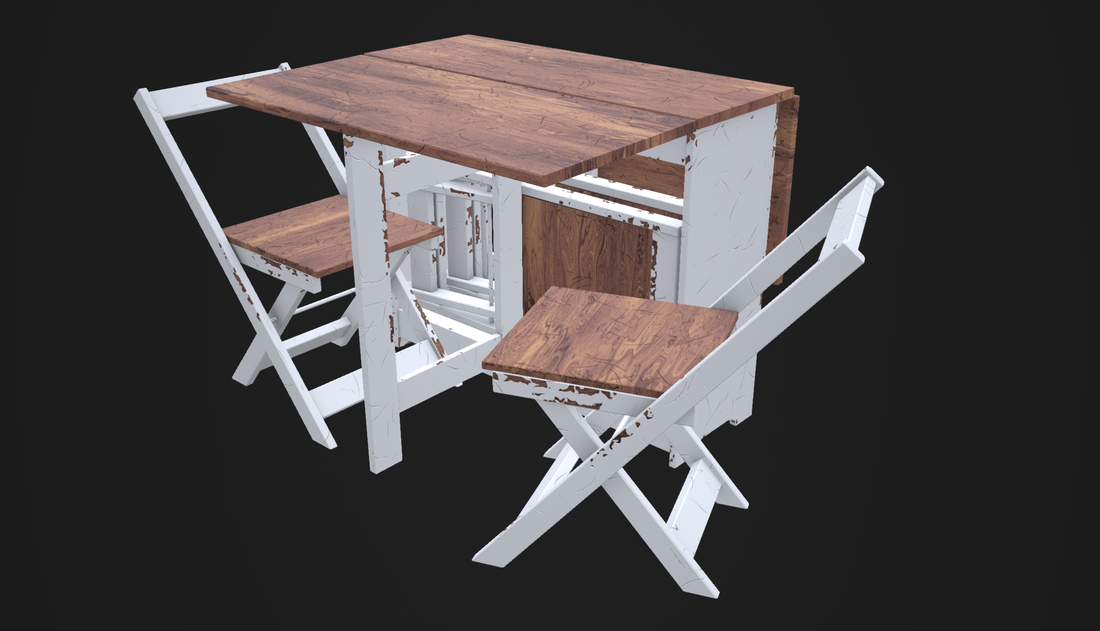
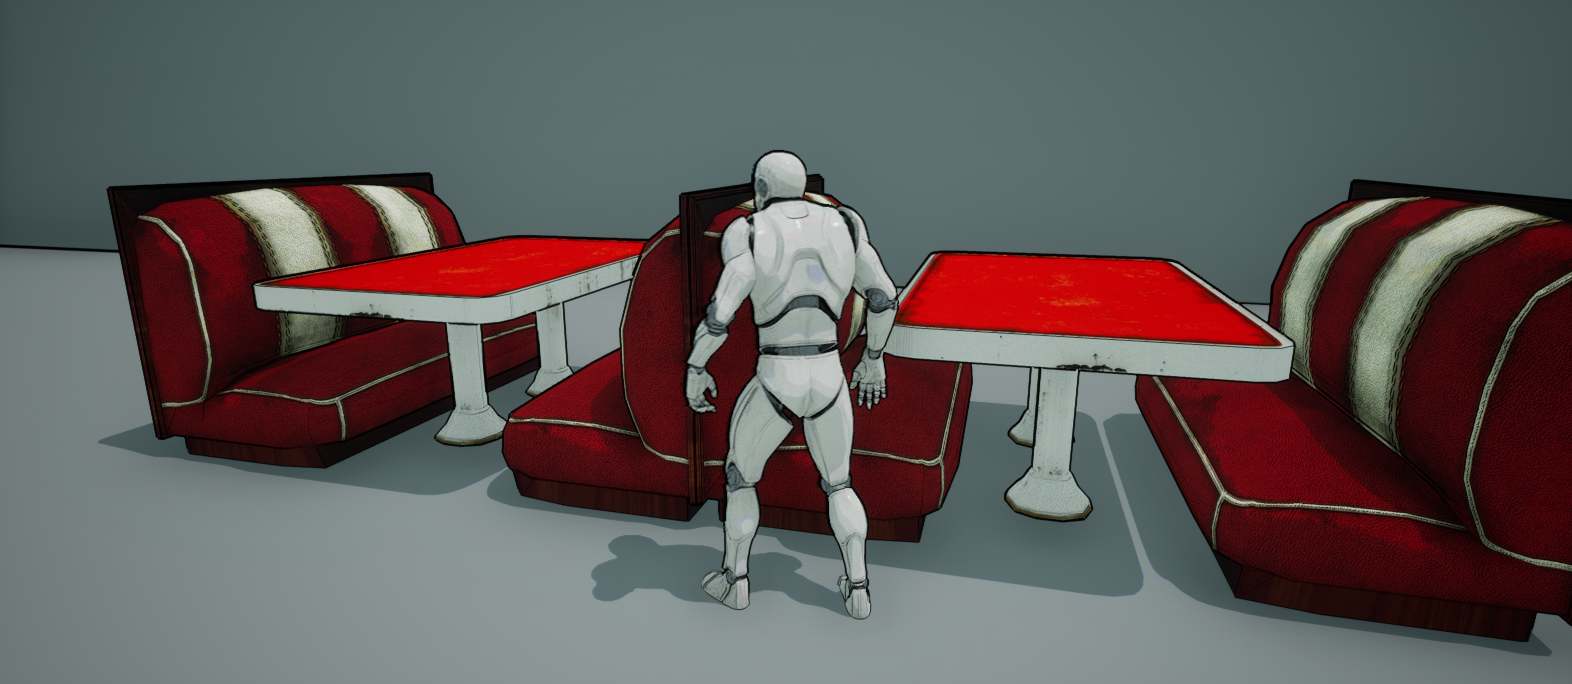
Seating area for my American Diner Scene, Modeled in Maya and Textured in Substance Designer. This mini scene consists of 3 separate models with a total of 731 polys. It Also uses a PBR workflows with exposed Parameters that could be called in Unreal Engine 4.

PlayStation Happiness Still Life by Andrew Booth 3D on Sketchfab

This is Andrew's personal interpretation of happiness that I will be exhibiting at the Great Yarmouth College’s Alumni exhibit. The brief of the exhibit was to display a theme of happiness. To achieve this theme Andrew took the approach a moments fake happiness that occurs while playing video games. All assets modeled & UV mapped in Maya, and textured in Substance Designer using a Roughness/ Metallic PBR workflow.

Work In Progress


Project: Wooden Labyrinth 

Picture
Picture
In recent 3 weeks I have started designing a new puzzle game with the inspiration of an old wooden labyrinth toy from my childhood I remember spending hour trying to complete the maze; never did. As part of this game I thought to implement feature that would be very interest to the players UX. 
​Instead on an overhead view of the maze to control the game; this time to have a third person perspective of the maze so the player is in the maze playing as the ball collecting coins while completing the maze but if you fall down the holes you loose a life; lose 3 lives then its game over.

​As the game the game progress the maze will get harder, more interesting with more functionality added such as flamethrowers, electric fields, glass maze, mirror maze, tube mazes, red or black coins that take coins away ect. 
Picture
I Started this project by modelling & UV mapping the first level in Maya, texture the level in Substance Designer and then import the level into Unreal Engine 5 with a custom collision mesh 
 After Importing the Level into Unreal Engine 5, I started working on the Pawn movement logic in Blueprint. I done this by creating input axis for left/right and forward/ back. With these input I created event for this input tin the pawn Blueprint, then using the axis values I plugged them into a make vector node for their respected Y or X value resulting in the axis values being converted into a location vector. 

I then multiplied this vector value with a float variable named movement speed, doing this would increase the speed of the pawn's movement with float value. As the pawn is a sphere component  from the content example built into the engine; I used an 'Add angular impulse in radius' which impulse an actor or pawn in a singular direction. Using this nude I used the the multiplied vector as the impulse and  ball component of the Blueprint as target. Using this node would mean when I move the pawn left/right or forward / back it would impulse  move the pawn in that direction.
Picture
While working on the functionality of the games' logic, I manually tested the game to ensure all functionality work with no bugs. I took this time to created the HUD widget with a global spawned coins and a live system. the next stage will be to finalise the item spawn and model the coins and ball character instead of using the contents example.

Project: Still Life Part 2

This is second part WIP of this Still Life, for the First please click here.
Picture
Picture
Picture
The next stage to this project was to model the four piece chair set with the same style as the table within Maya. Two unfolded on display and two folded away in the central area of the under table. Also UV mapped to the same Texel density as the table.
​
Once the chair was UV mapped in Maya, the project was then imported into Substance Designer 5. Using the same custom create substance wood material I textured the base of the chair and used a material blend with a greyscale mask to separate the base of the chair to rest of the chair to create the white paint material. Using a series of nodes to create a wearing look such as paint wearing node and a scratch generator. This is to create a wearing, tired and used look  as if its been used quite a lot.
Powered by Create your own unique website with customizable templates.
  • Home
  • About me
  • Asset Library
  • WIP Archive
  • Linkedin
  • Twitter
  • Contact Me